How to Apply Crystalline Waterproofing

Crystalline waterproofing materials remain a terrific way to protect your basement walls from the damage that water does by penetrating and freezing in your foundation.

In this process, crystalline waterproofing material is brushed onto basement walls. Here it penetrates the concrete cavities and forms a strong bond. This changes the porous concrete into a waterproof solid.

This process is most effective in a wet basement where water seepage is a problem.

One significant advantage of this material is that installation is straightforward and can be accomplished by any do-it-yourself homeowner.

Step 1: Cleaning

Before you begin application, you must completely clean the concrete wall surfaces. The crystalline waterproofing material will only adhere to the concrete surface if it is free from any other debris or dust. Use a wire brush to remove loose concrete or paint. A hammer and chisel may be needed for large pieces of concrete that are loose but can’t be brushed off. If there are multiple layers of paint that cover a wide area, you could try power washing the surface or even sandblasting it.

Step 2: Preparing

The next step is to repair your concrete surface by filling large cracks. Using concrete patch or liquid concrete in a tube, spread it over the surface with a trowel. Fill the crack completely and let it dry and set before doing anything else to the surface.

Step 3: Priming

Next you will prime the concrete for the crystalline waterproofing by thoroughly wetting the surface of the concrete with water. You don’t want to soak the area, but it should be damp, which will actually help with spreading and adhering the waterproofing substance.

Step 4: Mixing

In a bucket, you should mix the crystalline waterproofing material with water, according to the instructions. Apply just enough water so that the material becomes a thick paste.

The chemical process of the water and the material will cause the substance to warm. This is a natural and expected process, and evidence you are doing it correctly.

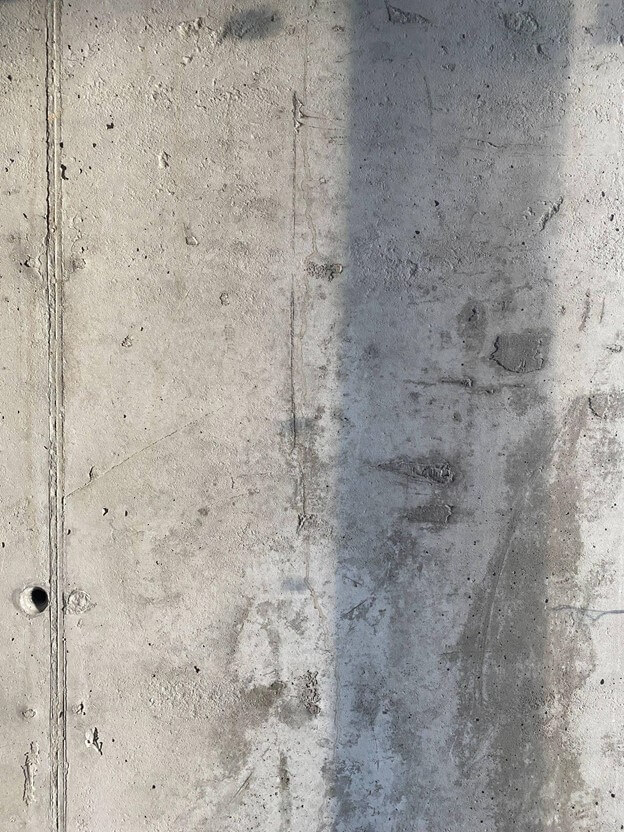
Photo by Yuriy Pavlov on Unsplash

Step 5: Applying

Using a masonry brush, apply a thick coating of the paste to the concrete wall. Make this coat thick but even.

Step 6: Curing

Once the crystalline waterproofing material is applied to the surface of the concrete, you must keep it wet for at least 48 hours. Lightly spray it with a misting bottle. This allows the materials to penetrate into porous concrete. If it sets too quickly, it won’t combine correctly and you will have wasted your time.

Liquid Waterproofing Products

Builders, contractors, homeowners and home repair enthusiasts know they have a range of options available when it comes to waterproofing.

And while waterproofing in advance is always the best, by changing the landscape and providing physical paths for the water to take before it ever reaches your foundation, sometimes that option is not available.

When you need a specialty repair or an emergency fix to stop water from entering your space, sometimes what you need is a liquid waterproofing product.

When liquid waterproofing products work best

While a solid barrier between you and the water is almost always the best bet, sometimes it just isn’t an option. For these occasions, thankfully there are lots of good options for liquid waterproofing.

Use liquid waterproofing products to patch a crack

The first, most obvious use of liquid waterproofing products is to patch a crack in a below-grade wall in your home or business. The ease of application is the most appealing reason to use a liquid waterproofer here. You can trowel in the liquid or, in many cases, apply with a caulking gun to completely fill the crack.

Using a liquid waterproofer allows you to create a full seal and reach deep into the crack, providing a more secure barrier against water.

Use liquid waterproofing to seal a driveway

Your driveway needs to be waterproofed too. In this case it doesn’t mean keeping water off the driveway, but it does mean keeping water from getting inside your asphalt or concrete.

Once inside your drive, water can expand when it freezes and speed the deterioration of your huge investment. Using a liquid sealant allows the waterproofing to permeate the entire crack, protecting from the top and from the bottom, as far as the sealant reaches. This creates a more effective patch.

Use liquid waterproofing as a final coat

Some contracts, and some contractors, like to take a thorough approach to completing a waterproofing job. That means adding a final layer of waterproofing for security, even when there are already sufficient layers of waterproofing in place.

In this case, a thin coat of sealant applied to the outside of the below-grade wall helps protect the barriers behind it.

Use liquid waterproofing to spray where you can’t reach

In rare occasions, a breach is too complicated to reach, or too expensive. In this case, a spray-adhesive sealant can work more efficiently. With the right tools and application techniques, it can work as effectively as other barriers, while saving time and effort exposing the problem area to larger tools.


Common Problems with Window Wells

Window wells are an important part of creating a livable basement. They allow daylight and fresh air into your basement, keeping it from being dark and dungeon-like. Additionally, they reduce the ways that water can get into your basement and damage your foundation and possessions.

However, owning and maintaining a window well requires a little bit of knowledge and work.

With this quick quide to problems and solutions with window wells, your window-well owning experience can go without a hitch. And you can keep your basement light and dry all season long.

Window well problem 1: keeping it clean

From dirt accumulating on the sides to the drain keeping water from collecting, keeping your window well clean is the most frustrating and time-consuming concern with maintaining your window wells.

If you have a drain that connects to your foundation drainage system, there are some upsides. First, you can hose down the sides of your window well to get off the regular dust and grass clippings that accumulate over time.

On the other hand, you must periodically clear out the drain so that it continues to allow water to flow out. This often involves climbing or reaching into your window well to sweep or vacuum out debris from the grate.

Window well problem 2: small animal rescue

Another problem with window wells is that they often capture unsuspecting creatures. Depending on your location and the time of year, window wells can trap frogs, rabbits, snakes, and other local wildlife.

Fortunately, some window wells are built to handle these situations, and they have stairs or ridges in them that allow animals to safely exit the well.

In other cases though, the best defense is someone from your home periodically checking the window wells and taking the proper steps when an animal is trapped.

Woodchuck trapped in a window well. From Youtube.

What are the proper steps to release an animal from your window well? It definitely depends on the animal.

Window well problem 3: flooding or breaking

A poorly installed or old window well might become susceptible to taking on more water than it can handle. This happens when water is directed into it from an outside source, or when groundwater flows through a broken window well boundary.

In this case, your window well puts your foundation and your basement at risk.

Only the hardiest of fix-it-uppers can handle this repair yourself. If the window well is causing more problems than it is solving, call a waterproofing expert.

What Are The LEED Levels And What Do They Mean?

By now we are all familiar with the LEED certification for buildings. Designers, builders, and architects all strive together to earn the highest possible Leadership in Energy and Engineering Design ratings and brag about them to prospective investors. Press releases include the grades of new buildings, and tenants boast of their LEED scores as they show around their own employees or clients. Projects with the highest LEED scores get local and national attention, and companies boast of their sustainability and eco-friendly buildings.

But what are the rankings, and what do they represent?

Well, there are four rankings for buildings, according to the US Green Building Corporation. Those rankings are certified, silver, gold, and platinum, with certified being the lowest level, and platinum being the highest. They are awarded on a point scale for achievements in certain areas of energy efficiency.

Certified 40-49 points

The first level of attainment for LEED certification is “certified.” Buildings that score between 40 and 49 points are Leed Certified. This means that they have met important standards for sustainability and energy usage in their selection of materials and building design. This is an important designation that shows a commitment to sustainable growth and building.

Silver 50-59 points

The next highest certification is “Silver.” A building that earns this status has invested time, energy, and additional resources to demonstrate their commitment to the environment over time. Through the use of credits, complex credits, and the right building materials and approaches to reduce energy usage, Silver buildings deserve recognition as a monument to sustainability.

Gold 60-79 points

Unlike in the Olympics, “Gold” is the second-highest level of achievement in LEED certification. However, just like in the Olympics, “Gold” status bestows a very high honor. The Gold status is reached only through meticulous care and careful dedication to the LEED standards, and an awareness of resource usage throughout the entire building process.

Platinum 80+ Points

The highest level that can be achieved on the LEED certification scale is Platinum. This is a distinguished level, and shows a rare deep investment in sustainability in every aspect of the building process. According to the USGBC website, fewer than 9,000 buildings in the world have earned Platinum LEED status as of August 1, 2021. These buildings are known locally and internationally to designers and engineers, and they draw additional visitors who simply want to see how this level was achieved.

Mar-Flex Supports Architects with AIA Certification Classes

Mar-Flex industry leading waterproofing designs and products have garnered a lot of well-deserved attention from builders and contractors around the United States. Our innovative and effective blends of recycled and new construction have helped countless projects reach the LEED certification they sought. And they have done this while providing top of class protection from water and moisture.

But did you know that Mar-Flex also works closely with architects?

You see, we know that an architect is as good as the tools they have to use in their designs, combined with their experience. So having well-trained architects is in everybody’s interest. If their designs can incorporate cutting edge technology to repel water in attractive and lightweight packages, they can do more and stretch buildings to new heights and shapes.

What is the AIA

The AIA was founded in 1857, designed to create standards for how architects were trained and to create basic ethical frameworks.

Today it has grown to include over 90,000 architects, and it helps manage certification to meet its mission, which is to “advocate for the value of architecture and give architects the resources they need to do their best work. Our work drives positive change through the power of design.”

Their website explains that “Licensed architects must earn continuing education credits each year to fulfill AIA membership requirements.” And once an architect is licensed, he or she might also need to complete continuing education requirements to renew their state license(s).

Additionally, architects who are working on getting licensed can use some AIA-approved courses to count toward the “experience” portion of the licensure requirement.

The AIA recognizes Mar-Flex courses as a way to earn continuing education credits that make meeting an architect’s goals and licensing requirements interesting and also convenient.

If you are an architect seeking licensure, or looking to renew an already existing license, the courses offered at Mar-Flex could help you earn or maintain your license while also giving you deep insight about the present and future of sustainable waterproofing.


What Can QuickSeal Products Do For You?

Once upon a time in construction, a manager had to choose between the most effective solution for a location, and the solution that got the work done on time. That meant compromises that could shorten the effective life of the work, especially the waterproofing.

However, now there is a solution that solves both problems at once. The QuickSeal waterproofing products offered by Mar-Flex are designed to be effective while also being easy to use and apply.

QuickSeal waterproofing membrane

QuickSeal waterproofing membrane is the simplest solution to starting the process of waterproofing your next construction project. This membrane, in emulsion or liquid form, can be applied with great confidence over any clean, dry substrate down to 0 degrees fahrenheit. With multiple application options in a wide range of effective temperatures, QuickSeal waterproofing membrane is the ideal solution for year-round construction.

QuickSeal waterproofing is available in the size you need

Many companies like to choose one product that can meet all their needs, to simplify ordering and issues related to inventory. Keeping the right items in stock is easy when you need fewer items!

To save you time and energy, QuickSeal WB (water based) comes in multiple sizes to meet your needs. You can order 55 gallon drums, which can come in pallets of 4 for a total of 220 gallons.

Additionally, we offer a 330 gallon tote, or our largest, the 6000 gallon bulk order.

The QuickSeal SB (solvent-based) solution has fewer options, but still offers enough variety to meet your next project’s needs.

You can order 55 gallon drums of QuickSeal SB, which can come in pallets of 4 for a total of 220 gallons.

The largest option, for your biggest construction needs, is the 6000 gallon bulk order.

ICC Approved

The QuickSeal solutions, both water based and solvent based, come with the ICC approval.

The ICC is an international ratings agency that has been certified to determine whether a product meets international specifications for a wide range of indicators. In the case of QuickSeal products, the ICC certifies that it meets a wide range of International Building Code expectations, International Residential Code expectations, and the Abu Dhabi International Building Code.

You can be confident that your QuickSeal purchase helps keep you and your project protected today and for years to come.

Planter Drains and their Uses

There is a growing trend in modern architecture that attempts to marry nature with construction. This seems a very easy and simple idea, but it is in fact very complex.

You see, at the very heart of construction has long been a desire for that construction to be the opposite of nature. That is, it must be able to stand up against nature, resisting water and wind and heat and cold. It must look and feel very much not like nature at all. It must resist.

So the move to marry the two has not been a natural fit. But it is happening.

In order to do this, architects must be prepared to deal with water, the enemy of buildings.

One way this happens is with planter drains.

Planter drains keep dirt in and let water out

In a perfect world, you would put exactly the right amount of water on your plant every time, and that would be the end of that. However, the world is not perfect. Sometimes you under-water. Sometimes you over-water. In fact, usually you over-water.

This is true in nature too. When the skies open, they usually deliver more water than the dirt can handle right in that moment, so the water must be taken away and re-enter the water cycle.

This is where a planter drain comes in handy.

Beneath the plants, beneath the soil, are one or more finely knit meshes that allow water to soak out without taking the dirt with it.

Additionally, at the top of the planter, is a metal tube with holes in it to quickly drain water that overflows and floats even above the soil line.

These together constitute a planter drain.

Picture is a screenshot from rainsmartplanters.com

The goal is to work together to quickly shunt water away from the soil, not allowing any of it to stand. However, the mesh is in place to prevent the soil going with it.

Many municipalities are experimenting with stormwater planters to help reduce runoff. A key piece of every one of these stormwater planters are planter drains, which allow water to be trapped in soil that feeds a series of plants that are beautiful, hearty, and which absorb a lot of water.

What is a bridge abutment? Or what is any sort of abutment?

If you are a contractor working with large earthworks, building roads, or transforming entire cities, the word abutment is not new to you. You understand the concept because you’ve built them, studied them, and you have seen what goes wrong when they are incorrectly done.

But in fact, if you have ever built something with Legos, or Lincoln Logs, or some other material, and then you tried to help it hold weight, you inadvertently were studying abutments, even if you didn’t know it.

An abutment, in short, is what holds up a bridge or other piece of construction that does not rest directly on pilings and the ground directly beneath it.

How does an abutment work?

The abutment in a construction design is Atlas at the bottom of the earth, holding everything else up.

The abutment rests firmly on the ground, and likely has piling dug deep into the soil and clay below. It had to be firm and steady, because it will end up holding a great more width than just the abutment itself.

The bridge, or other piece of construction (this is true for porches and other items that may extend out), is held in place on the abutment, and any weight that goes onto the bridge is transferred to the abutment.

That is, when you are driving and you get part way across the bridge, though you may feel as if the weight of your car is being held by the surface below you, there are actually complex forces at work.

Photo by edwin josé vega ramos from Pexels

The platform you are on is holding your weight at the moment, but it is not what is keeping your weight off the ground. That is, it is transferring your weight to an abutment. It is this abutment that truly holds the weight.

What does abutment mean?

It might help to know that to “abut” means to touch by way of a mutual border. That is, to share a common space or border. An abutment has a bridge or other span resting on it. This mutual space includes both the span and the abutment.

So if one thing is resting or placed against another, it can be said to be abutting it. In the case of a bridge, however, there is a permanent and secure seal. This allows the abutment and the span to work together to safely deliver you to the other side of the water below.

Avoid a Crisis Like the Champlain Condo Collapse By Waterproofing Your Building Project

We all watched the news in horror. Security videos captured the last seconds of a Florida condominium standing, then suddenly folding and finally collapsing in a heap of concrete and dust. The Champlain condo, in Surfside Florida, was home to hundreds of people. Days after the collapse, more than a hundred people believed to be inside are still unaccounted for, and presumed dead.

Even before the search and rescue operations came to a close, questions were being asked about the cause of the collapse.

Initial reports from inspections, both routine inspections and less frequent mandated ones, are starting to paint a sad picture about the collapse.

It was preventable. And the signs were there that it was coming, and people ignored those signs.

Photo by Joe Raedle / Getty images

Waterproofing matters

According to press reports, a pool inspector reported to his superior that he was seeing unusual amounts of water leaking under the building.

While it was not initially clear whether it was pool water, ocean water, or misdirected rain water, there is no confusion over what that meant. Mishandled water in building construction is a recipe for disaster.

Professional waterproofing experts know that it takes both the right design and the right materials, like Mar-Flex quality products, to keep water where it belongs.

When water reaches the steel rebar inside concrete pilings and supports, it immediately beings to eat away at the steel. The effect is faster if it is salt water, and if there are periods with and without water. This appears to be the case at Surfside, though a final determination has not been made.

Without the rebar inside to provide support, all the specifications for the strength of the concrete fly out the window. One fault at the bottom of a large tower means disaster for everything above it. That might be fine on the top floor, but in the basement level, it meant certain death for more than a hundred residents.

While not every building project is as tall as the Champlain Tower, every one with your company’s name on it and people inside represents an urgent need to attend to the details and do everything right.

That is why professional waterproofers stick with trusted products with a proven track record. Mar-Flex waterproofing materials have been trusted for a generation, and will last for a generation too.

Types of Mold That Indicate You Have a Leak or Crack

Basements, more than any other space, are known for their cold, moist, and undisturbed atmospheres. You might even find yourself greeted with the slightly sour smell of mildew buildup as you walk down the steps. Without the proper waterproofing and precautionary steps taken, moisture can easily build up in a building or house’s basement.

After exposure to water, materials in the right setting can take less than two days to develop mold. If your house or building has undergone water damage or water exposure, there are several types of mold to keep an eye out for:

Fusarium: This mold is unique in that it can grow and thrive at colder temperatures than other molds. It is typically found in homes with water damage, specifically within wallpaper, carpeting, and fabric. If discovered, carefully inspect adjacent rooms as this mold spreads quickly and easily;

Alternaria: This mold follows damp environments, meaning that there is a possible nearby leak or exposure to the outdoors. It can spread relatively quickly, so it is important to stop it early;

Mucor: Mucor is found most commonly near areas with high condensation and moisture, for example air conditioning units or HVAC units;

Chaetomium: The presence of chaetomium likely means severe water damage. It is indicated with a musty odor, and either a gray or black cotton-like texture depending on the growth stage;

Penicillin: Similar to the other molds on this list, penicillin can be traced to areas with high moisture levels. It can be easily spotted with its bright blue or green surface, and can spread quickly through the air;

Stachybotrys: Also known as black mold, stachybotrys is found in areas with consistently moist and unkempt environments. More specifically, black mold typically grows on cellulose materials such as drywall or cardboard;

Ulocladium: If this mold is found in a basement or building, it is a sign of extreme water damage. It may grow alongside the aforementioned fusarium, another indicator of inadequate waterproofing.

This is not an extensive list of all the possible molds, but it is still a good idea to keep a careful eye out for all and any growth. Though each mold may vary in danger and severity, each is an indicator that your building spaces may be in need of a check up. If there is suspicion of any dangerous molds, always be sure to contact a professional to inspect and remove.

Photo by Daria Shevtsova from Pexels