The distinct smell of damp basements is unpleasant, musty, and dank. Prevention is better that remediation when it comes to this smell. Increasing ventilation in your basement is extremely important when dealing with this problem. Another solution would be to install air bricks. Air bricks are manufactured for brick homes and foundations, increasing the fresh air circulating within. Running a dampproofing course around the floor and lower foundations will prevent moisture from entering. Dampproofing is painted on using special prevention paint, and is relatively simple to install on your own. Finally, keeping a regular temperature in your basement helps dry out any dampness that does get in. Cold atmospheres attract dampness, so keep your basement heated to at least sixty degrees all year round. By following these steps you can prevent the spread of dampness in your basement, and therefore eliminate that damp basement smell.
ShockWave – Revolutionary Waterproofing Technology
 ShockWave is Mar-flex’s answer to the harshest weather conditions. ShockWave is the most effective drainage board in the industry, with the ability to soak up 101.11 gallons per hour per linear foot of groundwater, and a compressive strength of 283.72 psi (meaning you can’t even crush it with a bulldozer!) ShockWave is a revolution in waterproofing, not only because of its incredibly unique efficiency, but also due to the fact that it is manufactured from 100% post-consumer recycled materials, saving space in landfills, and helping building professionals earn LEED credits. ShockWave is Mar-flex’s most popular drainage board, found on custom-built residential, multi-family, and commercial buildings all across the nation. Building professionals love ShockWave because it isn’t weighty like other drainage boards, and its simple to install, with plenty of accessories to make the job even easier. This drainage board is meant for the toughest environments, including heavy-clay, clay, or rock soil. Find out for yourself why even the experts at the World of Concrete awarded ShockWave with the Most Innovative Product!
Twip of the Day – Materials for Replacing Basement Flooring
 When moisture penetrates your waterproofing and enters your basement, it can damage organic flooring, breed mold, and cause harmful airborne contaminants. There are several options for replacing the flooring once it becomes damaged by water, these options will save you over time.
The first option for replacing a damp basement floor is inorganic carpet tiles. Since mold eats organic materials, you must choose carpet tiles that aren’t organic. Options exist that can be removed for cleaning easily and make a great vapor barrier and insulator.
The next option is to use vinyl. When choosing a type of vinyl to install, make sure that you choose one specifically designed for basement floors. Most basement floor vinyl options even make a good vapor barrier and provide insulation.
One of the best ways to prevent water damage to your flooring is to install a false floor. This sounds like a daunting task, but isn’t terribly difficult. If you have high ceilings in your  basement, this is a perfect option for you. First, you lay 1 1/2″ to 2″ extruded polystyrene foam directly onto the basement floor. Polystyrene doesn’t rot and insulates your basement, as well as providing a barrier for organic materials from moisture. Next, apply 5/8″ plywood on top of the polystyrene, then screw through the plywood and polystyrene directly into the concrete using fasteners which are specifically designed for that purpose. Finally, finish the job with what floor covering you want to put down.
Twip of the Day – Tips for Using Waterproof Paint

Waterproof paint is an important tool in the fight against moisture penetration. The basement is often a cooler temperature than the rest of the house, and this leads to dampness. Also, if there are any imperfections or damage to the foundation wall then water will find a way through and into your basement.
When you apply waterproof paint, assure that the surface that it is being applied to is dry. In order to get the paint to adhere to the surface properly it needs to be as dry as possible, because moisture becomes trapped in the material if it isn’t dry. Using dehumidifiers and a wet and dry vacuum will speed up the process. Unfortunately, if your foundation wall is damaged, waterproof paint can’t help you. Painting over damaged areas with waterproof paint is a waste of time. Therefore, use a wire brush and mortar to fill any damaged areas in the wall, then apply the paint.
One common mistake many homeowners make when applying waterproof paint is just painting the wall and stopping. Water will find a way into your basement from every space and hole it can, so make sure to pay close attention to seams where the walls and ceilings meet. You should use mortar to seal these small gaps, and then apply waterproof paint as an extension of painting the walls.
Concrete is porous, this means it absorbs moisture and waterproof paint like a sponge would. One coat of waterproof paint is not enough to properly seal the basement wall. Use at least two to three coats of paint to ensure proper protection.
Following these tips will save you time and money, not to mention give you extra piece of mind about the safety of your basement, and your possessions.
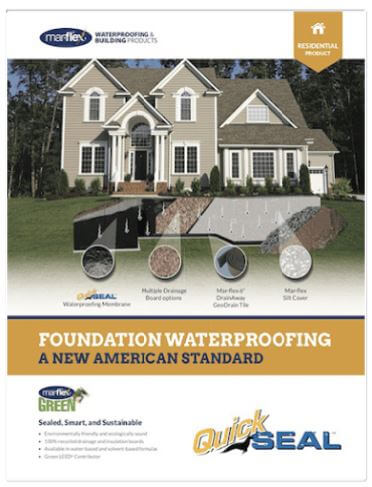
The Spec Sheets You Need
Mar-flex Waterproofing and Building Products is dedicated to its reputation of innovation and the manufacture of quality solutions. To this end, we try to be as accessible as possible so you can get the information you need to specify our unique and incredible products on your next project, from cross-trained customer service professionals, an easy to use online product catalog, and even a specification database provided by ARCAT. All of our commercial and residential 10-part and 3-part specifications, installation instructions, brochures, and other downloadable literature is available through this database. Visit our specs page today, or call our representatives at 800-498-1411 or email us at info@mar-flex.com.
Twip of the Day – Avoiding a Frozen Sump Pump
 Now that winter has set upon us, the possibility of a frozen pump rises and this tool is essential to the waterproofing of your basement so it shouldn’t freeze. One handy tip to keep your pump from this perilous fate is to use a larger discharge hose. Discharge hoses attached to your sump pump are more likely to become blocked with ice if the water has a limited amount of space to pass through. This is why you should use a larger discharge hose on your pump than what manufacturers included, and in fact most pump’s discharge hoses can be removed and replaced easily. Its always a good idea to bury the end of the discharge hose in the ground before you insulate the section of pipe that runs above ground. If the ground is frozen, the pipe should be buried deep enough to bypass the full extent of the frozen surface. Also, when the discharge hose begins to freeze, the motor is forced to do more work, and therefore runs the risk of overheating and failing. Doing work around the foundation of your property to direct water away from the basement will give your pump some breathing room, and reduces the risk it will become blocked with water.
There are a few other methods used to keep your pump from failing this winter. For instance, laying the discharge pipe at a point so that the water’s exit is lower the pump itself will reduce the risk. Also, connecting a freeze-resistant hose to the end of your discharge pipe increases your protection against the frost, just be sure to aim for a distance of at least twenty feet away and use a smooth rigid hose so that there is no place possible for water to collect. Finally, depending on where the freezing of water is occurring, you may want to heat your basement to a temperature that allows the continued flow of water, not giving it a chance to freeze. By following these simple tips, you can save yourself plenty of money and keep your basement free from water, as well as keep that sump pump working to its optimum efficiency.
Twip of the Day – Finding and Identifying Basement Mold
“Basement mold is a term refers to the types of fungus that grow in basements under certain conditions. Basement mold is harmless in small quantities, by as it grow, it becomes more and more of a health hazard. Some will cause certain types of allergic reactions while others are outright poisonous. If left untreated, the basement mold will keep growing, eventually spreading through the entire building. This is why you must find the mold before the problem gets out of hand. Once you find it, you will need to be able to identify it—otherwise, you won’t be able to figure out how to get rid of it.
Finding Basement Mold
One of the easiest ways to identify the mold is by it’s stench. However, this is only true for some types of basement mold, others may not start to smell until their growth reaches a certain stage. That is why you may want to take a more proactive approach and check the spots where the mold is most likely to emerge. That way, you will have a better chance of spotting it while it is still at manageable size.
Basement mold needs a wet environment in order to grow. It will grow near the pipes and along the walls. The mold feeds on common household materials such as plywood, drywall, furring strips and carpet padding, as well as dust and cellulose in carpets themselves. Try to check any parts of the basement that are hospitable to mold at least once every week. Be sure to bring a flashlight with you—you may not be able to get adequate illumination without it.
If your basement suffers any sort of flooding, the walls will become infested with mold spores, which will remain dormant until they come in contact with water. The spores can remain dormant for a long time. Just because the mold didn’t develop after the flood doesn’t mean it won’t become an issue several years down the line.
Mold Safety
If you find a patch of mold, try not to inhale too deeply and don’t touch the mold with any part of your body. If it gets on your clothing or your tools, wash it immediately. You can identify the mold by sight, so there is no reason why you should be touching the mold in the first place.
Identifying Basement Molds
Basement mold can be identified based on a number of factors. First, there is color. Basement mold comes in a variety of colors that range from light gray to black. They may have green, blue and/or brown tinges. If the mold is closer to black, it is either the Stachybotrys or Cladosporium molds. If it’s closer to light grey, it is either Aspergillus or Fusarium molds.
To figure out which type of dark mold and you have, look at the texture. If the basement mold looks slimy, it is probably Strachybotrys. Otherwise, it’s Cladosporium.
To figure out what kind of light colored mold you have, look at the growth pattern. If the mold grows in disjoint circular patches, it is most likely to be Aspergillus. Otherwise, it’s Fusarium.
The Next Step
If possible, try to get the mold tested in a lab. While the factors described above are usually fairly good indicators, only the professional analysis will be able to tell for sure. If the mold patches are small, you may be able to remove it yourself. However, if the patches are fairly large, you will need professional help.”
article courtesy of doityourself.com
Online Catalog
Mar-flex Waterproofing and Building Products is the leading innovator in the entire waterproofing industry. Our 100% Green products are not only unique, but effective, and value priced. Mar-flex moves further into the future with the introduction of our online catalog, available in easy e-reader format. Check out our online catalog today to see what makes Mar-flex different than any other waterproofing company.
Twip of the Day – Dampproofing With Household Items
Dampproofing your basement can be accomplished without spending extra money on costly materials. During the rainy seasons, basements get humid, making it harder to clean. This humidity also contributes to the growth of mold and mildew, so before you begin check your basement thoroughly. You’re looking for any pipes that leak, or leaks coming from walls. Seal these up with epoxy or mortar and assure your basement is free of leaks before you continue. Next, remove everything from your basement, a clean basement will reveal any additional cracks or holes which need to be repaired. Then, spread gravel evenly on the basement floor near corners and peripherals, because gravel absorbs moisture and prevents it from spreading across the basement. Hang socks with coal in them to add odor absorption. These socks can be hung from walls, ceilings, or anywhere convenient. Finally, rock salt is effective at reducing moisture. Fill a 6 gallon bucket with rock salt, then place a fan over the bucket and turn it on. This allows air to circulate over the salt, eventually soaking the salt with the moisture in the air. When the salt becomes too damp, dry it out in the sun, then repeat the process until your basement is moisture free.
Why You Need Control Joints
Random shrinkage cracks are inevitable and occur when the foundation of a home settles. These cracks happen to every home, but Mar-flex offers a solution to control the cracking. The Mar-flex Control Joint System is designed to control and eliminate these cracks by creating vertical control joints on both sides of the foundation wall. This, combined with the Mar-flex Waterstop Elastomeric Sealant and protection added by the Mar-flex Fiberglass Fabric Reinforcement product ensures a watertight basement. Mar-flex control joints are an economical, easy to use system for eliminating Random Shrinkage Cracks wherever they occur. Check out our Control Joint System today!