 Mar-flex Waterproofing and Building Products is the leading innovator in the waterproofing and building products industries. Mar-flex was the first manufacturer to introduce and offer a 100% recycled and Green drainage solution, as well as an entire line of Green products that will help contractors achieve LEED certification. To this end, Mar-flex continues with its reputation of innovation and success with the new Concrete Control Joint System. The Mar-flex Concrete Control Joint System is designed to eliminate random cracks that are inevitable because of volume changes. To ensure your structure is protected, we also apply a water-tight outside control joint which is filled with Mar-flex Waterstop Elastomeric Sealant and protected by Mar-flex Fiberglass Reinforcement.
Why do we recommend concrete control joints on every structure? Its because concrete, like many other construction materials, expands and contracts with moisture and temperature changes, and these are referred to as volume changes. This change produces cracks in hardened concrete, unless properly controlled. The best provision to take against this problem is to install concrete control joints at predetermined locations, preventing crack-producing stress forces.
The Mar-flex Control Joint System is designed to ensure optimum protection, with a watertight outside control joint which is created when filled with Mar-flex Waterstop Elastomeric Sealant and protected by Mar-flex Fiberglass Reinforcement. Basement require foundation walls that are watertight and waterproofed. Our system provides an economical, easy to use system for eliminating these cracks, which are unavoidable, uncontrollable, unsightly, and will leak water if not properly planned for ahead of time with control joints. Check out our selection of control joints today, or browse our catalog to see our full line of products.
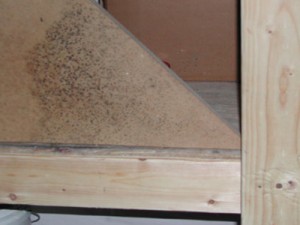 Basement ceilings are the perfect place for mold to propagate, because mold needs a cold, damp area with a lack of ventilation and sunlight. You don’t have to give up hope and have a moldy ceiling, because there are several steps you can take to get the situation under control.
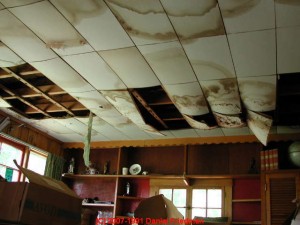 appliances or busted pipes, be sure to check your ceiling for mold. If its possible you should check or replace any insulation materials in the floor and ceiling cavity, because leaving them damp will encourage mold growth. Mold typically begins growing within 48 hours of moisture saturation, but if it is in the floor or ceiling cavity you may not notice it for a long time. Install exhaust fans in your bathrooms and kitchen to cut down on the moisture that remains in those rooms.
 Concrete sealer is an essential part of any concrete finish. It is used as a curing agent for new concrete and a protective barrier for existing concrete. When fresh concrete is placed, our sealer is applied on the surface to trap moisture. This keeps it from drying or curing too quickly, because a weak bond is created between the surface and the rest of the concrete, greatly increasing your risk of cracking and scaling. Sealers also protect your concrete from the elements, especially in the harsher climates where there are several freeze/thaw cycles throughout the year. If you don’t apply a sealer, water will penetrate the surface of the concrete and freeze, breaking apart the concrete. SurfiSeal creates a barrier that is impermeable to water, protecting your concrete for years to come.
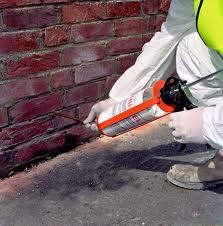 Dampproofing your basement will save you serious money in the future. The costs of prevention will be far less than repairing the damage, because many of the repairs can be extremely costly. The first step to reducing dampproofing costs in your basement is to fit a good solid membrane between your concrete and your subfloor. Any moisture that gets under the membrane will sink back into the ground under the structure, so if you aren’t protected, you open yourself to excess water damaging your basement. The use of a good dampproofing course around the lower 2 feet of your basement wall, stopping the propagation of mold and mildew. You can buy damp proofing paint – applied just like regular paint – to protect your basement walls from moisture creeping in. Another step to preventing water damage and reduce costs is to use air bricks. There needs to be adequate amounts of ventilation as well as heat. This is because heat dries out dampness, and ventilation will help prevent moisture. Install air bricks in your basement walls, higher than any outside water level but low enough to have a circulatory effect.
 Mar-flex Waterproofing & Building Products is the leading innovator in the fight against moisture penetration. We’ve introduced products like the Geo-Mat drainage roll, manufactured from 100% recycled materials, the first of its kind in the world! With so many popular and efficient products, Mar-flex knows you need access wherever you are – nationwide. To this end we’ve made it easier than ever to find the nearest distributor of our products near you! Now, all you have to do is visit
 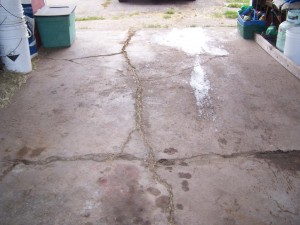 Homeowners often worry about basement floor cracking, but what about the garage? Garage floors are often poured concrete, which means they are as prone to random shrinkage cracks and volume changes as your basement floor. When you discover that the floor of your garage is cracked, don’t panic, there are several products that are inexpensive and repair the problem quickly. Even the best kept garage floor will eventually crack, and will require repairs at some point.
 cracks in your floor. These products can be easily applied with a caulking gun and are ideal for cracks since they are versatile and able to compensate for expansion and contraction in concrete. For depressions and pit marks, concrete filler products are the best choice. Simply follow the manufacturer’s mixing instructions and apply the material with a floor trowel. Make sure you follow the manufacturer’s recommendations regarding the drying time of the product. Garage floor repair has become a simple DIY task with the products available, so don’t worry when you find these cracks.
 Mar-flex Waterproofing and Building Products is the leading innovator in the waterproofing industry. Mar-flex helps you improve your bottom line with the best waterproofing products in the industry, transforming ordinary basements into livable spaces. Mar-flex stands behind each of its products with the guarantee of quality and versatility, and warranties on all Mar-flex Systems – with some even offering lifetime warranties! Mar-flex offers everything you need to go that next step, including spray equipment, egress and non-egress window wells, perimeter drainage, telescopic vents, and control joints. You can rely on Mar-flex to deliver everything you need, from specs, training, job site support, equipment installation, sales support, LEED certifications, and much much more. Call us today at (800) 498-1411 or email us
  When you discover that your basement is filled with unpleasant, musty, and dank odors you’ll understand why we often talk about prevention. Mold and mildew propagates within 48 hours of water damage and moisture penetration, so preventing the damage in the first place is your best option. Good ventilation in your basement is vitally important, no matter the size of the space, and will help get rid of the smell mold and mildew leaves behind.
 Proper ventilation is paramount to the health of your basement and foundation. Contractors feel that foundation walls, once they are back-filled, are out of sight and out of mind. Eventually you will experience ugly water issues, and you will realize those contractors were wrong. Once water and dampness saturate your foundation and basement, mold and mildew develop quickly. Don’t cut corners when it comes to your basement, crawl space, and foundation.
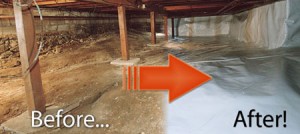
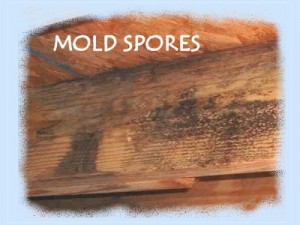 Crawlspaces are common in homes without basements. If you have a crawlspace, you could have mold growing. Due to the way crawlspaces are constructed, they are perfect breeding grounds for mold and mildew – containing moisture, holding in heat, and shielded from sunlight. The only way to protect from this is to ventilate the area and help by scraping off any mold you find. Over time mold may still build up, and the time it takes to clean is largely based on the length of time the mold has been there.